Showing posts with label kitchen. Show all posts

Fall Decor In The Kitchen


Fall has officially arrived, and right on que our Colorado weather did a flip. We went from 90 degrees on Tuesday to 64 degrees and rain yesterday and today. It's okay, though. The cooler temps mean turning on the oven is acceptable again. At least for the next 24 hours. It'll be back in the 80's by the weekend.


Either way, fall decorating has begun here at A Joyful Cottage, and I'm ready to share some of the kitchen decor.

New French Farmhouse Dining Chair Pads


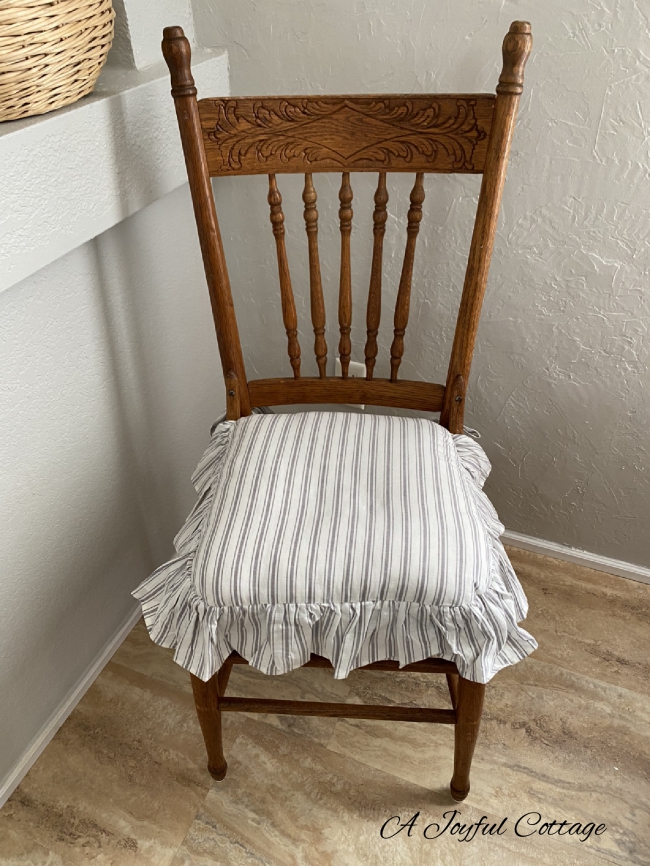
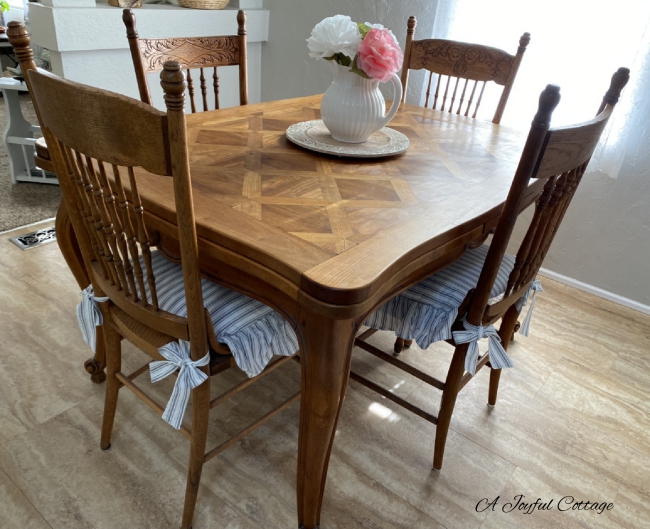
I've been on the lookout for dining chair pads for my perfectly imperfect dining room chairs, and after two months of searching for the perfect chair pads I think I can say I found them. I wanted chair pads on the feminine side, in a neutral color, budget-minded, and they had to say "French Farmhouse".


I found these gray and white stripe chair pads online at Piper Classics, after doing a search for "French Farmhouse chair pads" on Pinterest. The fabric is cotton, and the pattern is called "Timeless Ticking". I especially like the width of the ties, which gives the bows a crisp look, just the way I like them.


These chair pads were on sale, plus I used free shipping and 10% off coupons, which made them very affordable. 


I thought about making my own chair pads, but I doubt I would have saved enough money to make it worth my time and effort. Especially when I consider those charming ruffles.


Have a great weekend!

Hugs,


French Country Chair Makeover


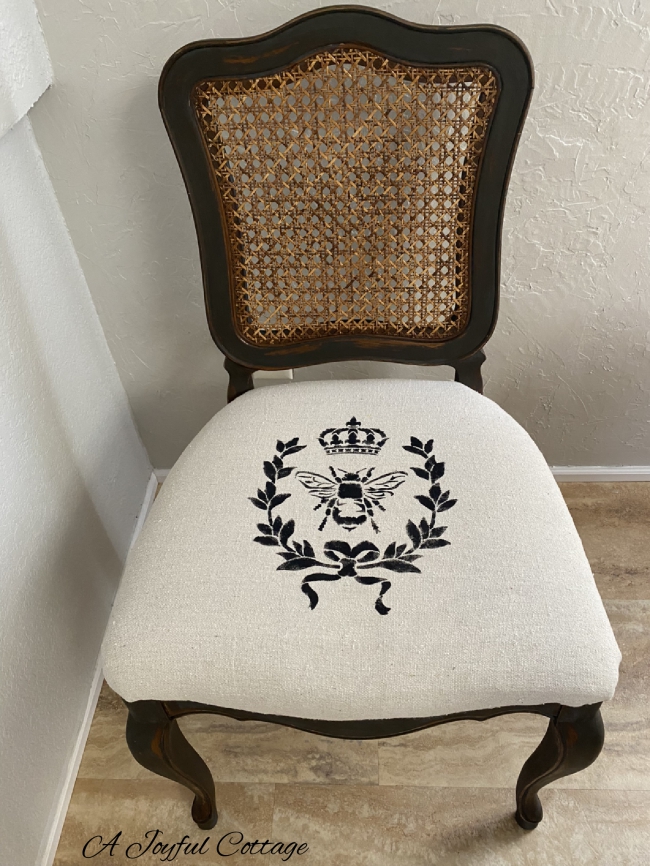
This is a makeover I've been itching to complete, and now that it's finished I'm thrilled to share it with you.


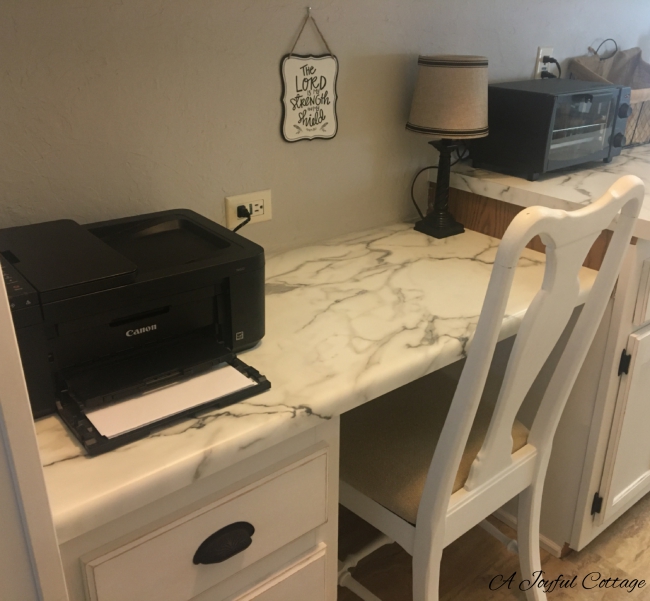
When I changed out the chairs of my imperfectly perfect dining table and chairs, I was able to salvage one of the old chairs for use with my kitchen desk. I had a larger chair there that kind of overwhelmed the small desk, so I was happy to have a smaller chair to replace it.

French Country Wall Shelf and Copper Pans


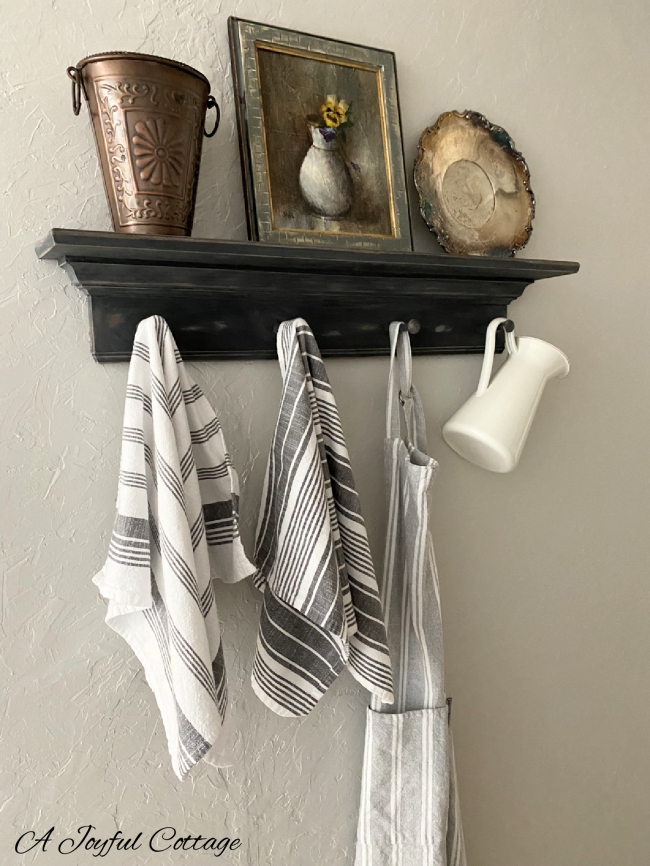
When I planned my kitchen makeover, I had it in mind to hang a shelf with a French Country vibe. This week I installed a thrifted Longaberger wall shelf that I found in a thrift store in March.

Quick, Easy and Budget-Friendly Wall Decor with a Vintage Vibe


Last week, during my staycation, I came across a new store that caught my eye. I was on my way to a consignment store to do some browsing when I drove by a rather large shop called Cozy Cottage & Co..  I did a quick turn around and pulled into the parking lot. In my book, any store with a name like that deserves a visit.

Creating a Faux Brick Wall with Joint Compound


It always feels good when a particular home improvement project is complete. After finishing the kitchen cabinet painting project, I doubt anything I do from here on will have the same impact on my satisfaction scale. However, the faux brick wall comes pretty close.


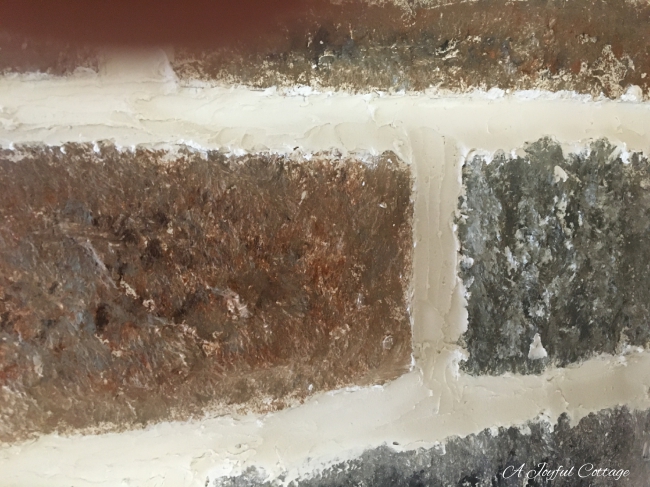
This close up of the wall shows how authentic the brick looks.


Here's how I achieved this faux brick wall.

Applied one coat of sealer/primer to the VOG (Vinyl-Over-Gympsum) wall.


Created a template with 3/4" masking tape.


Spread a thin coat of joint compound over the entire template, making sure to leave tabs of the masking tape revealed. This gives something to pull, and then peel off the masking tape. 


Here's what that looks like.


Now the faux brick wall is ready for painting. 


While they were still wet, I painted each individual brick with Folk Art acrylic paints in various colors. Also, after the painted bricks were dry, I went back in with an old table knife and added joint compound between the bricks to give the look of mortar. This is something I haven't seen anyone else do. I'm thinking about painting the "mortar" in a color that gives it more of an aged appearance. Maybe ivory, or pale gray. What do you think?


At the end of this post I've added some Youtube videos that show the process in detail, in case you're interested in learning more about creating a faux brick wall with joint compound.

By the way, the entire cost of this project, including the decorative paints, was about $20.  A definite statement in my kitchen for very little money. And, honestly, this was a pretty easy and fun project.


Hugs,


Youtube faux brick wall videos:


Spring Centerpiece


Forsythia is one of my favorite signs of spring, and although it hasn't yet made its appearance here in Northern Colorado, that didn't stop me from featuring it in my spring centerpiece. That's the beauty of faux florals. When we don't have access to certain flowers or greenery, a nice faux substitute can suffice.

Kitchen Cabinet Painting - Reveal of the Finished Project


 Hi Cottage Friends,


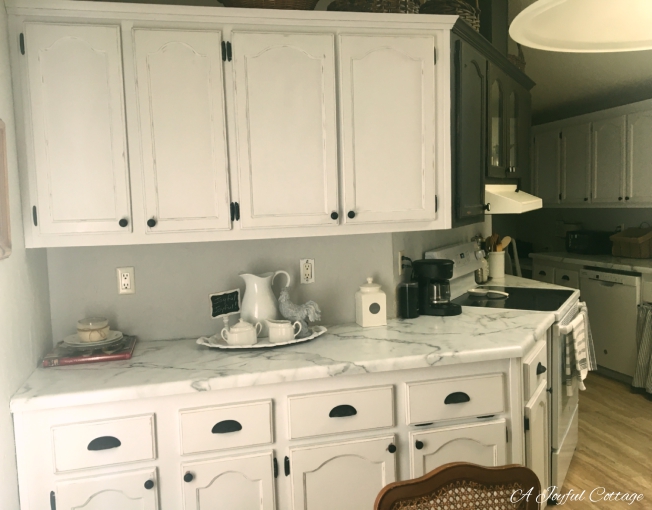
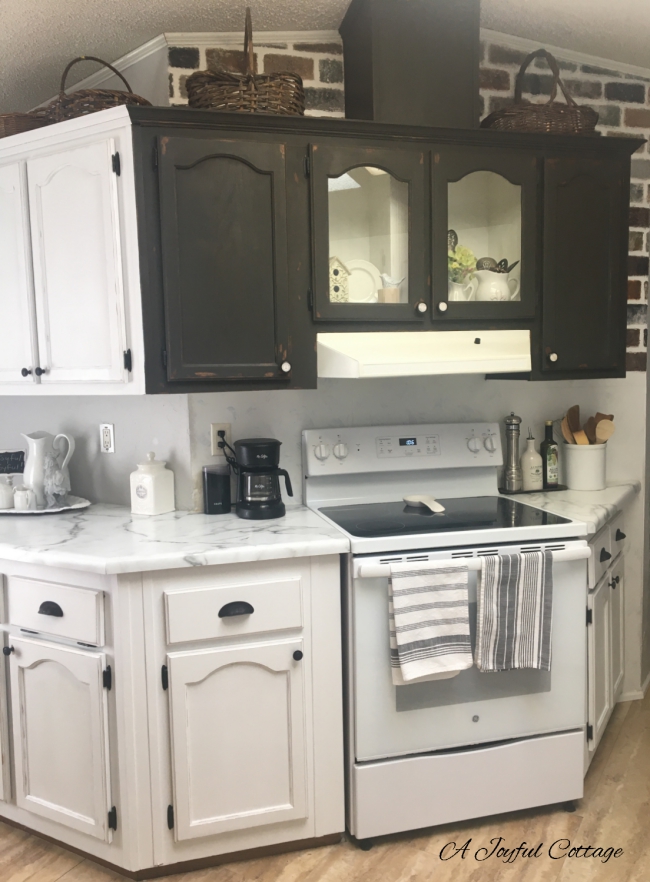
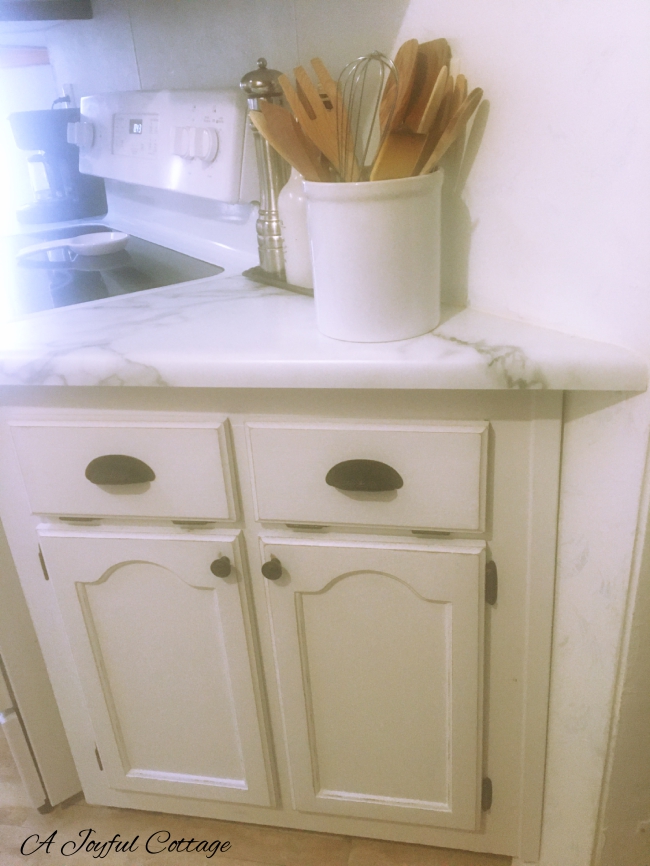
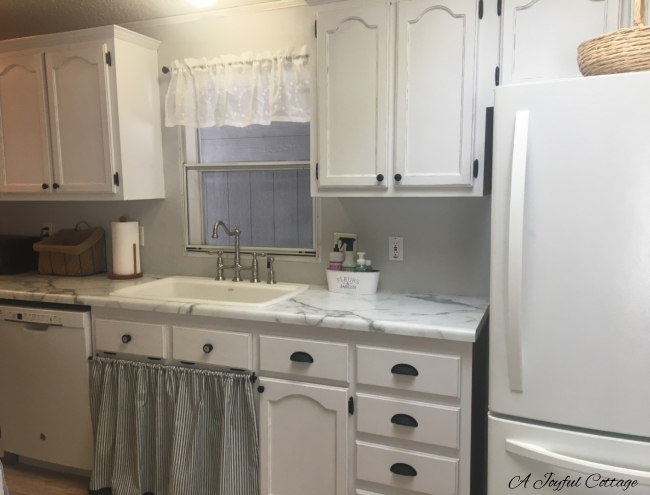
My kitchen cabinet painting project is finished (except for a few little things that need attention), and I'm happy to show you the results.


I recycled a tension rod and two brackets, that the previous owner of my home left behind, to hold my sink skirt. The rod was white, so I painted the ends black, and attached the rod brackets to the cabinet frame. I've kept the doors and will paint them later, then keep them with the hardware in case some day I sell my home and the next owner wants to put the doors back on. I'm good at filling holes and painting, so I'm not concerned about the holes I drilled for the brackets. The door to the right of the skirt is where the trash can is, so I won't need to move the skirt to dispose of trash. I'll be storing supplies and other items I occasionally use behind the skirt.


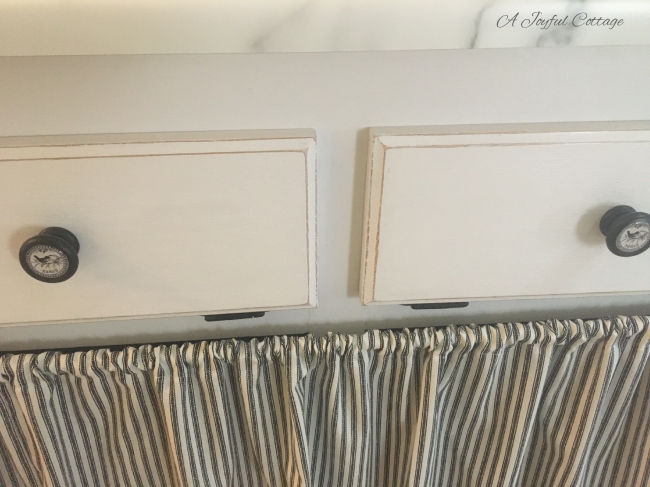
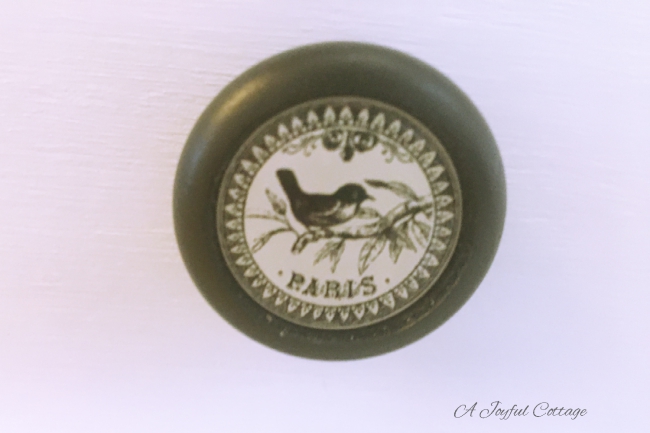
I added knobs to the two tip-out trays from the same Etsy shop that supplied the knobs for the cabinet over the range. I wanted the sink cabinet to have a different look from the rest of the cabinets. The sweet bird sold me on these knobs.


When I first planned this project, I had in mind to makeover my sink cabinet to look more like a piece of furniture, and I found some Pinterest photos that inspired me. 


Source


Source


Unfortunately, the design of my cabinets didn't allow for adding decorative pieces on the sides. I had considered removing the tip-out trays and installing a false drawer front to replace them, and then adding an applique before painting, but the cost to change out the tip-out trays to a false drawer front was about $125, and I just couldn't justify the expense. I mean, really, it's not that much money in the grand scheme of things, but I'm pretty frugal and thought that money could be better spent on other things in my home. The total cost to change the tray knobs and make the skirt was about $27, so I'm glad I made that decision.


Now that the cabinets are painted, I'll turn my attention to painting the trim and baseboards, and finishing the faux brick wall. I have a plan for my dining chairs, too. Not to mention lighting changes and other decorating ideas I want to make happen.

I hope you'll stick with me as I continue making this home my own. 😊

Hugs,


Fall In The Kitchen


Fall has definitely arrived here in Northern Colorado. Overnight lows have been in the 30's. Brrrr. And while I don't like the colder temperatures, I do like the turning of the leaves and seeing my neighbors placing pumpkins in their garden beds.

Kitchen Cabinet Painting Progress - One Section Complete


Welcome Cottage Friends,


My staycation is nearly over, and I wanted to share the progress I made on my kitchen cabinet painting project. Now don't go thinking I spent all my time working. I certainly did not! I played a lot and rested even more. However, I was so close to having one section of my cabinetry finished (all I had to do was distress and wax the doors and drawers before reinstalling them), that I wanted to go ahead and complete it. I'm so glad I did, because I love the way this part of my kitchen looks now.

Kitchen Cabinet Painting Progress


Sunday and Monday were extraordinarily pleasant days here. Rain cooled things off, and I was able to open my windows and let the fresh air fill the rooms. The cooler temperatures energized me, and I, once again, felt like painting my kitchen cabinets.

Giveaway Winner and Home and Garden Update


Hello Cottage Friends,

Today's one of my days off, so I've got time to update you on what's been going on in my garden and home. But first I must announce the winner of the Biblical Minimalist book giveaway. The winner is


Congratulations Debbie! Please email your mailing address to me and I'll arrange for Cheryl to send you a copy of her book. I hope you enjoy it as much as I have.

Thanks to everyone who entered the drawing. It had been awhile since I'd done a giveaway and I'd forgotten how much fun they are.

Now on to my garden and home updates. 

First the garden, which in my case is a patio garden. This is the last photo I posted.


And this is how the patio looks this morning.


Can you see the changes? I've moved plants around, and added some decorative items. I was surprised to find out how much sun my patio actually gets throughout the day. Because I work from 5:00 AM to 2:00 PM, I didn't get a real feel for the hours of direct sun this spot gets. So when I was home for a full day and took note of the sunlight. . .well, I realized I needed to make some changes to benefit my flowers.

As I said, I also added decorative items, which I think enhances the patio. I'm partial to fleur-de-lis, so when I found this one in the outdoor decorations at At Home for 50% off, I snatched it up.


This little sign was 50% off, as well.


I found this willow art piece at a thrift store for a couple of dollars. It was au naturale when I purchased it, so I gave it a white chalk paint treatment for a shabby chic look.


These all were inexpensive purchases that for me add a homey touch to my little retreat.

Several of you commented that I needed a little table between my wicker chairs, which I agreed was a necessity to hold a drink. The space is pretty small, so it took me awhile to find something that would work there, and also wouldn't break the bank. One day on my way home from work I stopped in at Goodwill and Eureka! I found my little table for $3.99. 


When I have the time I'll spray paint it a new color, but for now it's fine.


I found this sweet birdhouse sitting on the ground outside my patio fence (left behind by the previous owners) where it was hidden from sight, so I brought it inside the patio to enjoy.


Another change I made was to add some in-ground planting. There's only a smidgen of hard clay soil in my patio area, just below the porch railing. Now anyone who knows anything about clay soil knows that it's nearly impossible to grow anything in its natural state. You have to amend the soil so it will drain properly. I'll do another post sometime on how I accomplished this in a super easy way, but for now here's the result of less than two hours work.


I'm pretty excited about this little patch of what eventually will be my mini cottage garden. The Foxglove (rear left), and the groundcover Spotted Dead Nettle on the left and Ajuga on the right are perennials. I planted the pink geraniums, which I already had on hand, to keep within my budget. I'll add more perennials later, and this will become a low maintenance beautiful addition to my patio.

Hanging above this area are my wrought iron planters. Another Goodwill find at $5.99 for the small one, and $6.99 for the larger planter. 


These like-new, sturdy planters were an incredible bargain. I had decided that I would just have to wait until next year to do this project because there was no way I could pay retail for planters like these. I couldn't find anything under $25, and that's for something small and cheaply made.  Did you catch the little fleur de lis at the top of the planters. How could I resist?

I feel like I've done enough with my patio this year. Next year I plan to do the lattice wall I wrote about here. And maybe some other things. But for now I'm turning my attention to the inside of my home.


Come inside and we'll chat about my plans for the kitchen. This is a big project on a tiny budget, and I'll do as much of the work myself as I can muster. Here are some recent photos. (Excuse the messy appearance; I didn't plan on using these for the blog, but they actually make the room look better than if I took photos in its current even messier state.) 


I've already begun this project by removing the batten strips on the walls, and caulking the resulting gaps. I've deep cleaned the inside of the stove hood and above the cabinets (which was an amazingly hideous job because obviously the previous owner hadn't bothered to clean for years), and washed down the walls. I've removed all the backsplash. A local custom countertop company has measured for new countertops. Here's a sample of the laminate I'm using, Formica 180 fx Calacatta Marble in Satin Touch.


You're probably wondering why I would use a custom countertop company rather than Home Depot or some other big box store. Well, I had Home Depot price it out, and it was a lot more expensive. Plus, my local guy will remove the old countertops and dispose of them and the sink, something Home Depot would not do. So, if I went with Home Depot I would have had to pay a handyman or contractor to do that for me, which would have added to the cost. So, although we often think we can't afford a small business as compared to a national retailer, I say, "do your homework". You may be surprised at how much money you'll save by using that small local business to do your work.

I'll have the sink and faucet replaced, too. These are tasks I'll need a plumber to complete. What I will do myself is texture and paint the walls, and paint the cabinets. Praise the Lord for Youtube! I learned how to remove the battens, and now I'm learning how to texture walls. It's never too late to learn how to DIY. 

I'll be sharing a lot more about this in the days ahead, so stay tuned.

One more thing before I go. Please forgive me for not replying to your comments and/or visiting your blog. The past few months have been an exercise in adjusting to this new life of mine. It's a huge change for me and my energy level at the end of a work day is pretty low. Any work I do on my home and garden is done on the two days I have off. Having said all that, I am working on resolving this issue, and making the changes needed to reconnect with all of you. You are so gracious to visit and leave kind comments. I don't want you to think I take that for granted. I don't. There are plenty of other blogs that you could visit, and I know that. So, thank you from the bottom of my heart for making time for me. I will work to do the same for you. God bless you.

Hugs,